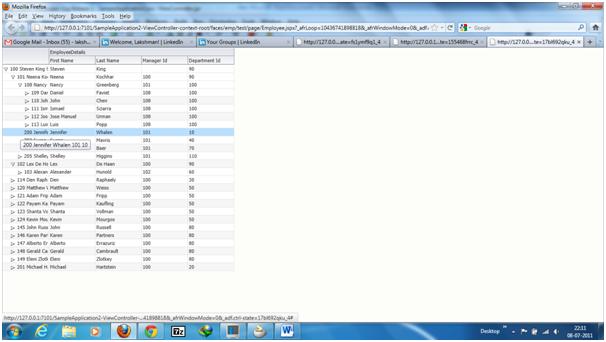
Let us start with a simple application that shows the employees under a manager in a hierarchical way using the af:treeTable component.
The page shows the employees under a manager
Schema Used: HR schema that has Employees, Departments table.
Steps to create the application:
1) Launch Jdev and select the Default Role while launching.
2) Goto Application Navigator and create a new application. Select ‘Fusion Web Application (ADF)’ as the Application Template and give any name.
3) Click on ‘Next’ button and give a name for your model project as ‘EmployeeModel’ and click on ‘Next’ button.
4) Keep the Default values in the ‘Configure Java Settings’ dialog and click on ‘Next’ button.
5) Name your UI project as ‘EmployeeViewController’ and click on the ‘Next’ button and then click on the ‘Finish’ button.
6) Create a Database Connection in the Application Resources.
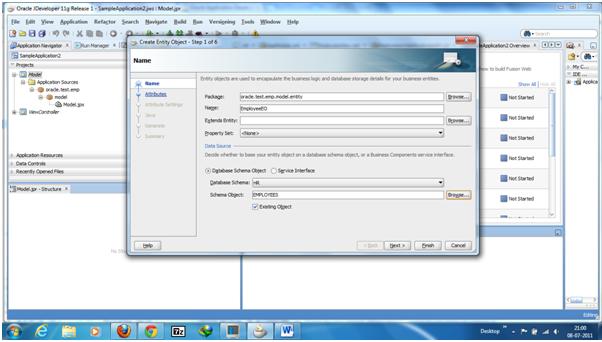
7) Create an EmployeeEO by right-clicking the model project and by selecting the BusinessTier –> ADF Business Objects –> ‘EntityObject’
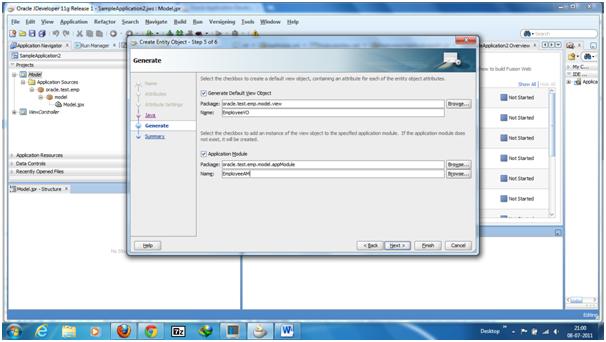
8) Create the view object ‘EmployeeVO’ and the application module ‘EmployeeAM’ in the ‘Generate’ dialog and then finish. Now, the EmployeeEO , EmployeeVO, and EmployeeAM will get created in the respective packages.
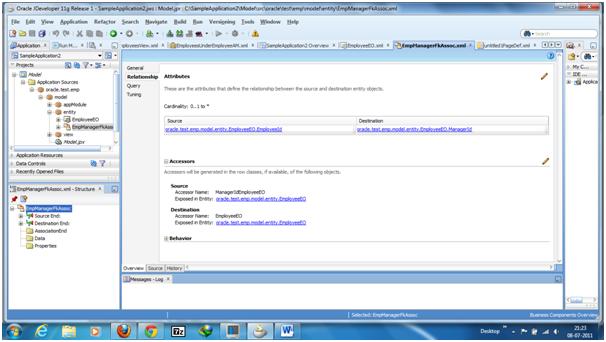
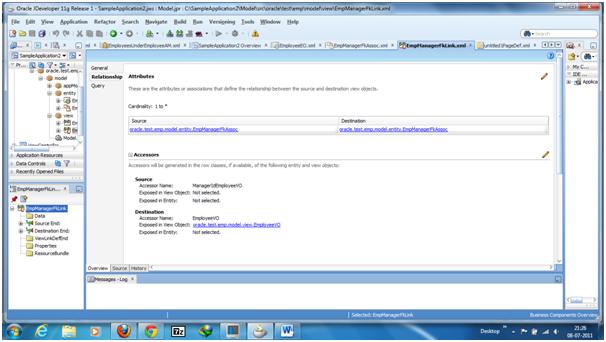
9) Creating the EmployeeEO will also create a SELF association viz., EmpManagerFkAssoc for the EmployeeEO. The association ‘EmpManagerFkAssoc’ shows the relation between two Employee entities (Every employee will be reported to his Manager (except CEO of the company).
10) Creating the EmployeeEO will also create a view link viz., EmpManagerFkLink between instances of EmployeeVOs. The viewlink EmpManagerFkLink shows the relation between two employeeVOs.
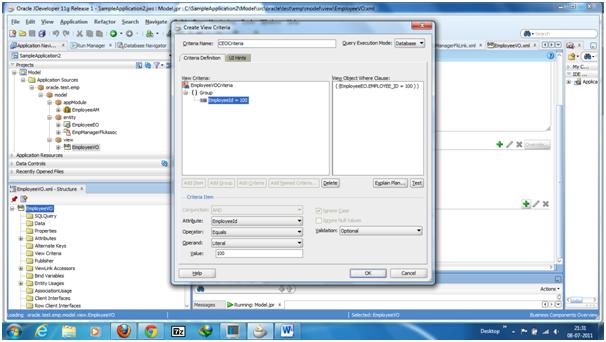
11) Now, we will create a viewcriteria that returns only the CEO (here, the empNo 100). To create viewCriteria, open EmployeeVO and goto ‘Query’ tab. Click on the ‘ + ‘ icon in the viewCriteria secion. Click on ‘AddItem’ button of the viewcriteria dialog and select EmployeeId in the Attribute list and put ‘100’ as the literal value.
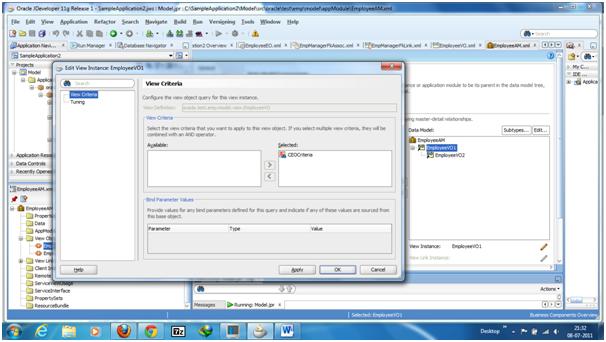
12) Open EmployeeAM.xml and goto ‘DataModel’ tab. Add the above viewcriteria to the ‘EmployeeVO1’ by ‘Edit’ing the ‘EmployeeVO1’.
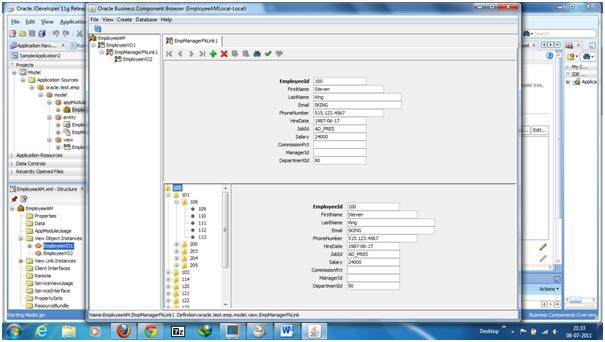
13) Run the EmployeeAM and you will see the employees data as shown below.
13) Now, we will create show the employees data in a Jspx page. Forthat, goto EmployeeViewContoller project , right click on it.
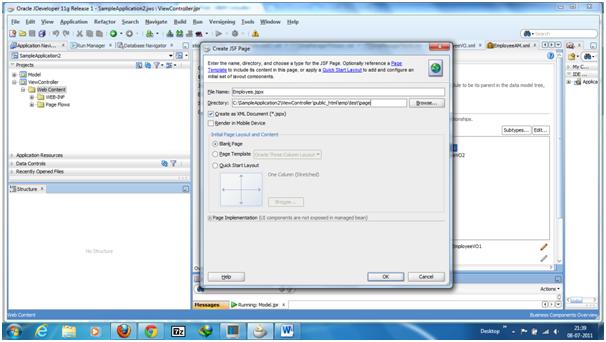
14) Select WebTier –> JSF –> JSF Page –> and give the jspx name as ‘Employee.jspx’ and click on ‘Ok’.
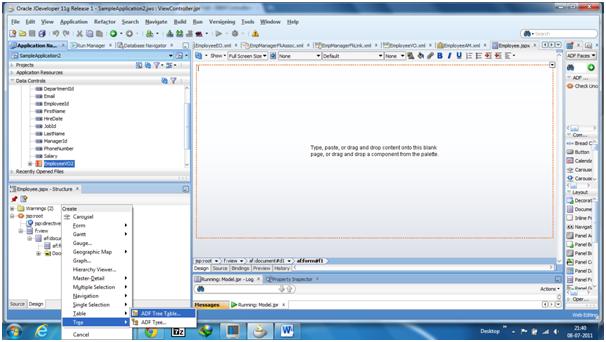
15) It creates an empty jspx page. To create the treeTable, drag the ‘EmployeeVO2’, from the DataControl ‘EmployeeAMDataControl’ that is present in ‘DataControls’ .
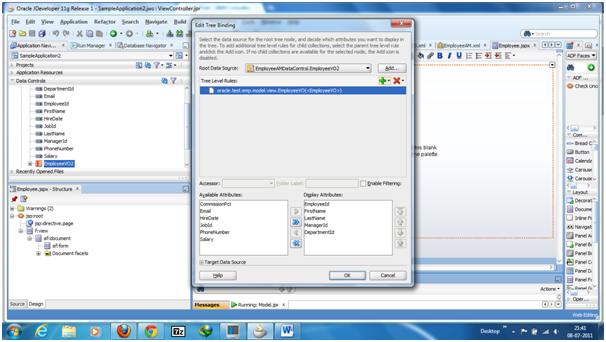
16) Drag the EmployeeVO2 on to the Form section of Employee.jspx as Tree –> Tree table.
17) If you want to show extra information like ‘First Name, Last Name, Manager Id, Department Id’, paste the below code in the Employee.jspx after the ‘pathStamp’ facet.
