This blogs helps you to work with a Database Adapterprovided in Oracle SOA Suite.
Please go through my previous blog <link here> on the initial setup required to work with a Database Adapter.
Why Database Adapter?
Service Oriented Architecture is all about services, its about your entire business application modeled as Services.
In a Business Application, it is obvious that you need database to interact with. But a database by itself cannot be exposed as a service. For ex, in order to interact with it, you need to write a Java program, and using JDBC connectivity, you connect and interact with the database. If this is the case, how can you use it in a 100% SOA based application?
The only way to use it is to expose it as a service. And how is a database exposed as a Service?
The Answer to it will be to introduce a layer over it, so that it uses the database it covers, and yet exposes it as a service, i.e. something like a wrapper.
And Oracle SOA Suite 11g provides a similar solution to it called a Database Adapter. With this, you can use your existing database as a service in your SOA Application.
It also provides various other functionalities like polling a database, checking for any changes in a specific table in a database, etc.
The Example below gives you an idea on how to use Database Adapter with the SOA Suite.
It is assumed that you have a database up and running.
In this example, we take the user input which will be the EmployeeId, and return his FullName, Salary.
This example uses the concepts of mediator, transformation of data, webservice.
Working with a DBAdapter
1. Create a new SOA Project, name it DBAdapterExample
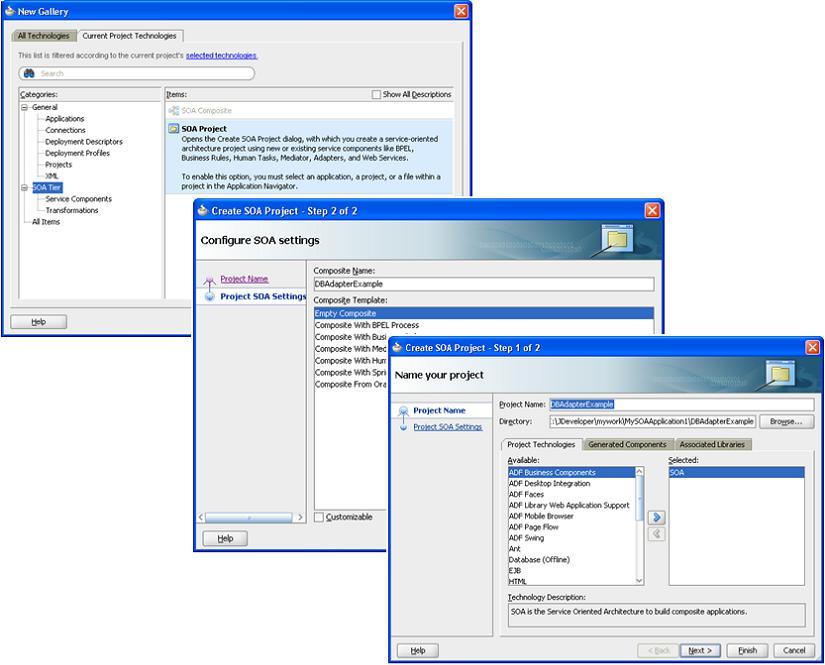
2. This creates a new project folder, with an empty composite.xml
3. You need to first define the input and output xml formats used in the example.
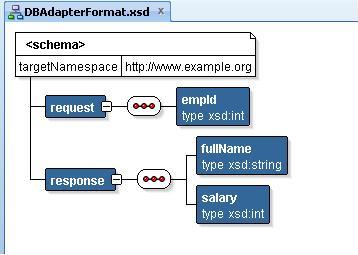
In this example, Input is EmployeeId(Int) and Output is FullName, Salary
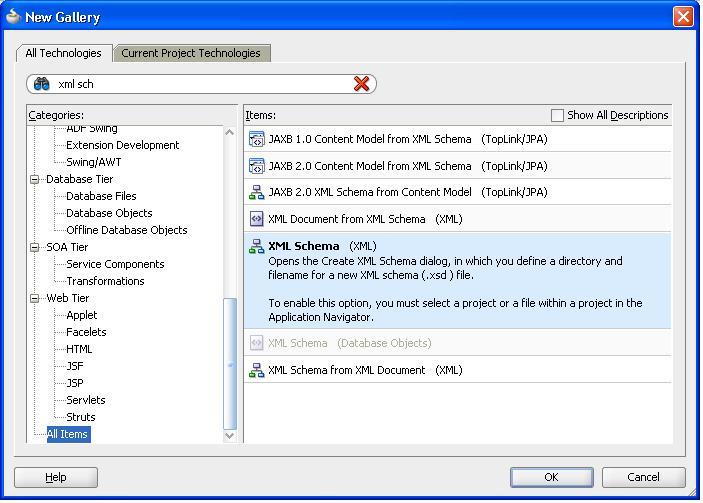
Create a new XML schema that has 2 nodes with input and output format types
rt click on xsd folder in the project –> new XML Schema, name it DBAdapterFormat.xsd
4. Define the schema as below
5. Creating a Database Adapter
-
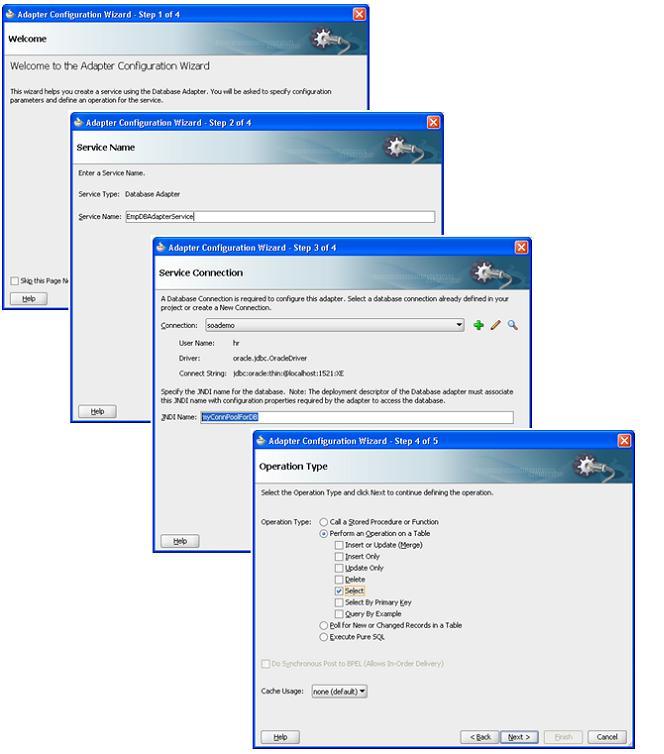
- Drag and Drop a Database Adapter from the Component Pallette, into the “External References” swimline in the composite.xml, name it EmpDBAdapterService
- Create a database connection, and give the JNDI name for the outbound connection pool for the DBAdapter that you’ve configured(verify my prev<link> post for this)
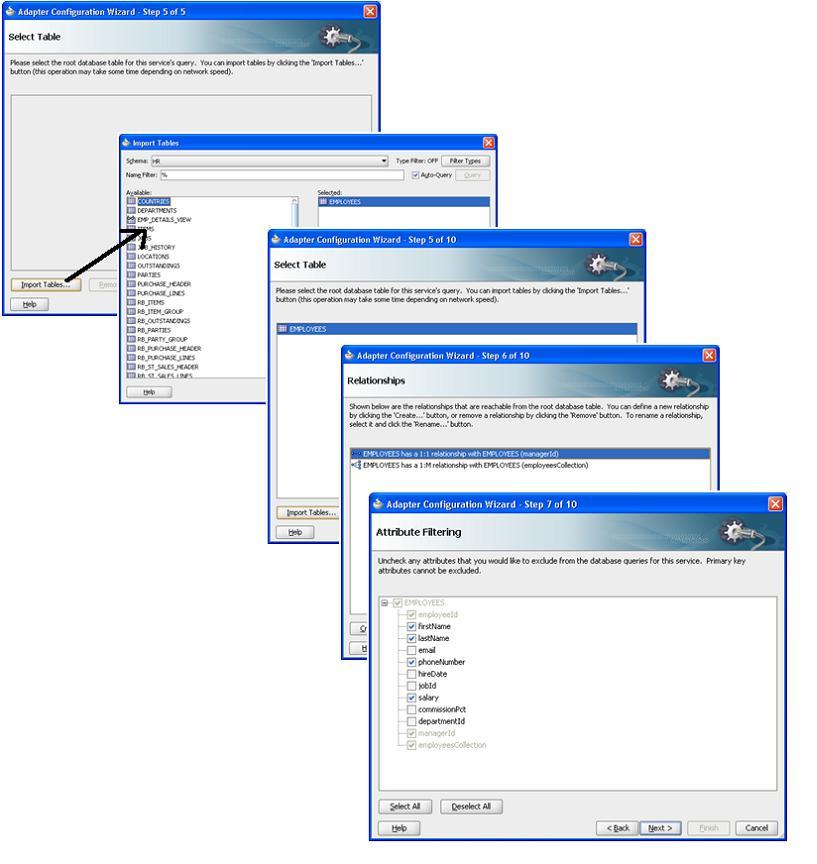
- Select the operation that you want, Select in this case
- Import the database table you want to interact with, Employees in this case
- You may remove the relationships that you see in Step 6, or leave it as it is
- Select all the fields that you will use in this application(no problem if you even select all and later on do not use it)
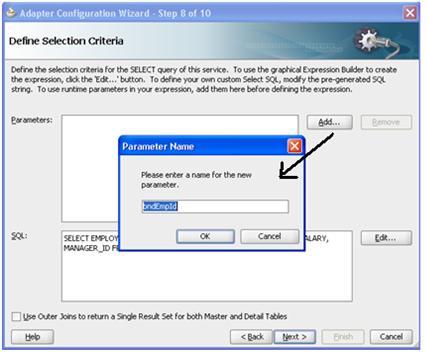
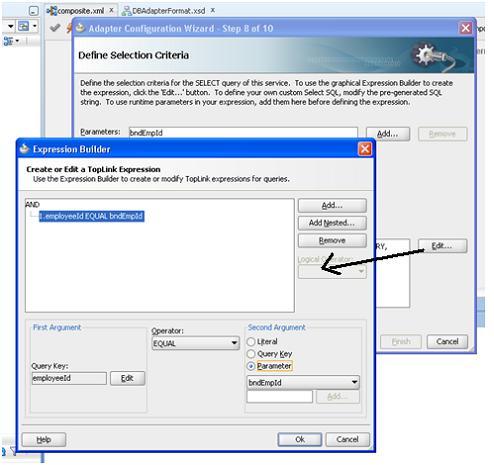
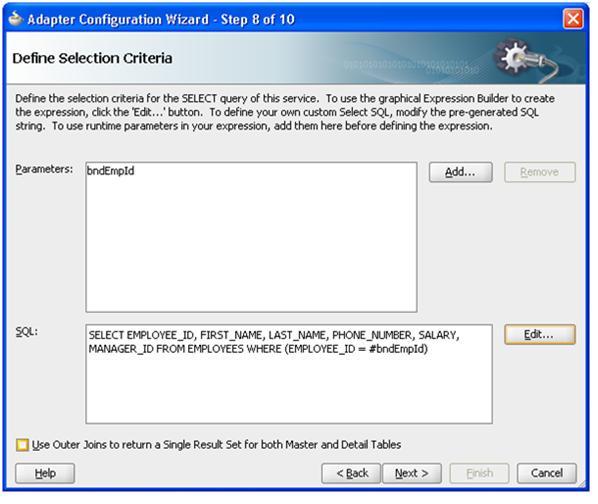
- In Step 8, you have to create a bind variable(parameter), and use it in the where clause of the SQL query. In this example, we send the employeeId, and so, create a bind variable by some name(bndEmpId), and use it in the where clause as shown
- Finish the wizard to last step, and you will see a new Database Adapter in the composite.xml
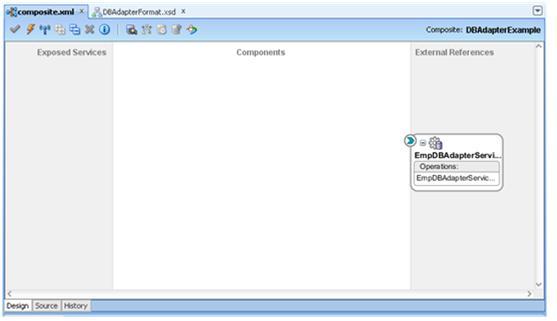
Now that DBAdapter is created, in other words, the underlying database is exposed as a service, you can talk to the service to get its data.
But since the service is not exposed directly to clients (Services only in Exposed Services swim lane can be accessed by external clients)
So, you now have to create an exposed web service whose input and output parameters are same as the Database Adapter. Please remember that the Exposed service is just a client to access the Database Adapter, and has no relevance to the database or its created Adapter.
Creating a webservice Client
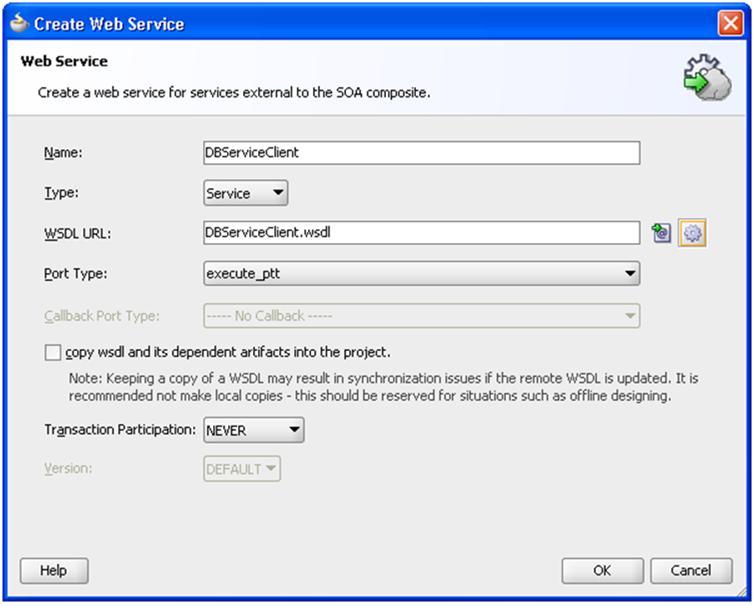
Drag and drop “Web Service” from the component palette to the exposed Services swim lane. This opens up the WebService Wizard
Name it DBServiceClient.
Choose Generate WSDL from Schema option in the WSDL URL field in the wizard (shown in the figure)
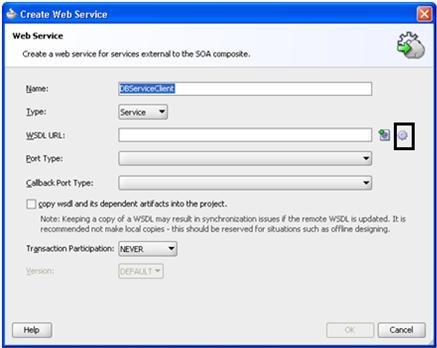
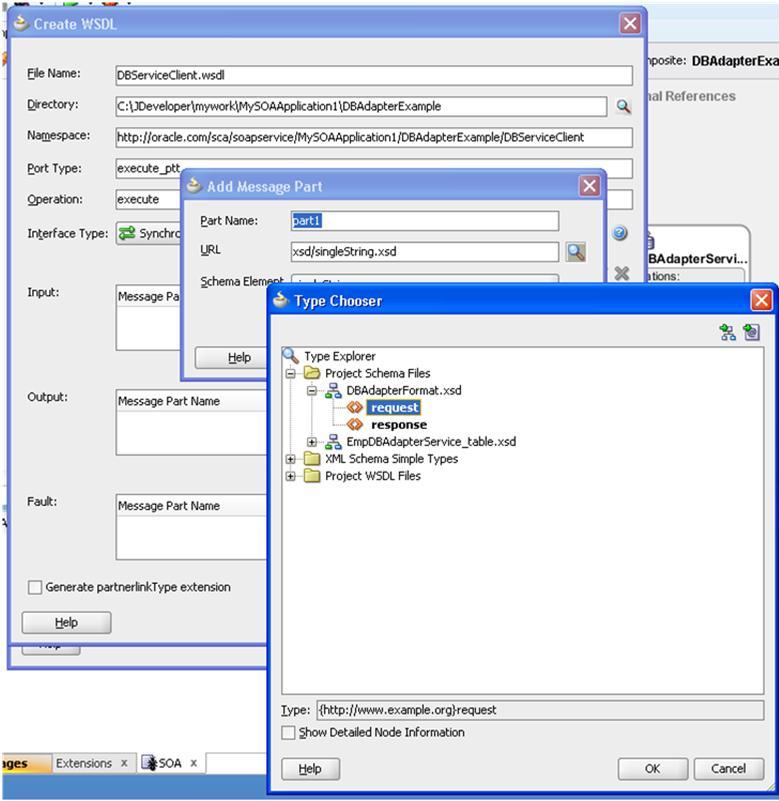
This opens up a Create WSDL wizard, where you’ll choose Synchronous Interface, and map its input and output parameters as per the defined schema

Click on Add Message Part in Input of the wizard, click on browse button in URL section, select the request part from DBAdapterFormat.xsd that we have created in the initial phase
Similarly, add the output message part as well.
After adding both input and output message parts, the wizard looks similar to this
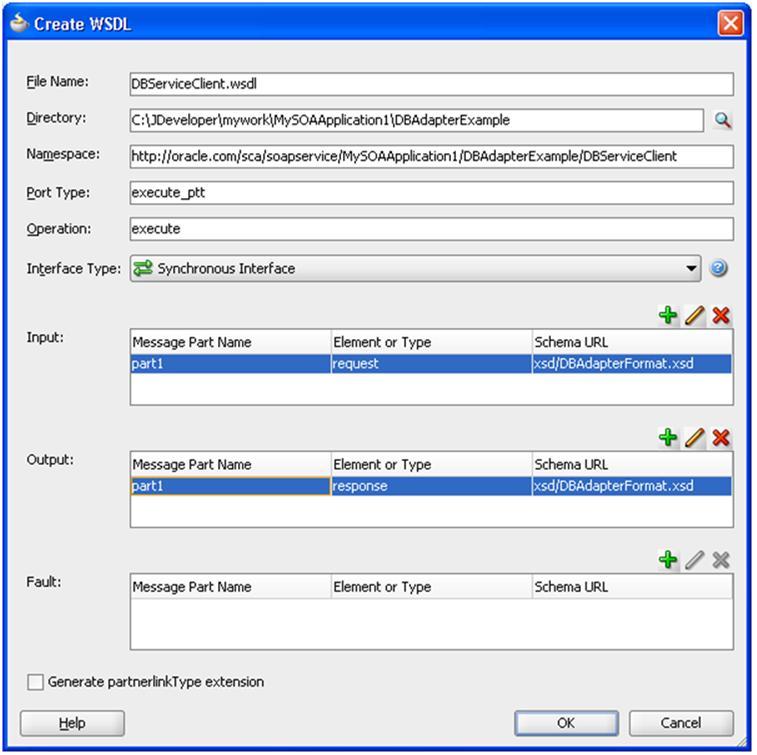
This finishes the creation of the client web service.
Now, the question is how the client web service and the DBAdapter Service communicate with each other.
We make use of a Mediator for this task of linking each of the services.
A mediator, as its name implies, mediates between two different services, and offers various functionalities intercepting the request. In this case, it manipulates the response from the DBAdapterService to transform firstName and lastName to fullName.
Creating a Mediator
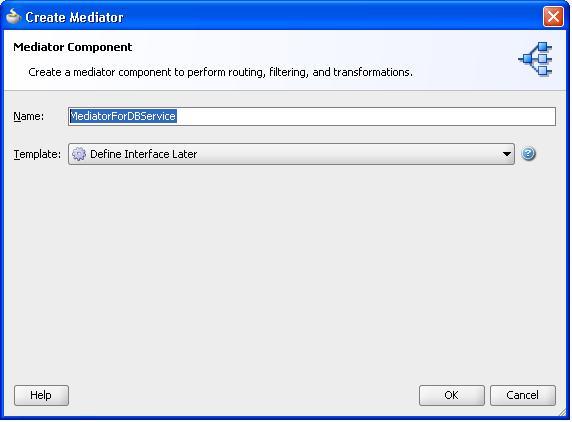
Drag and drop a Mediator from the Component Palette into the Components swimlane.
You may choose to Define Interface Later during its creation.
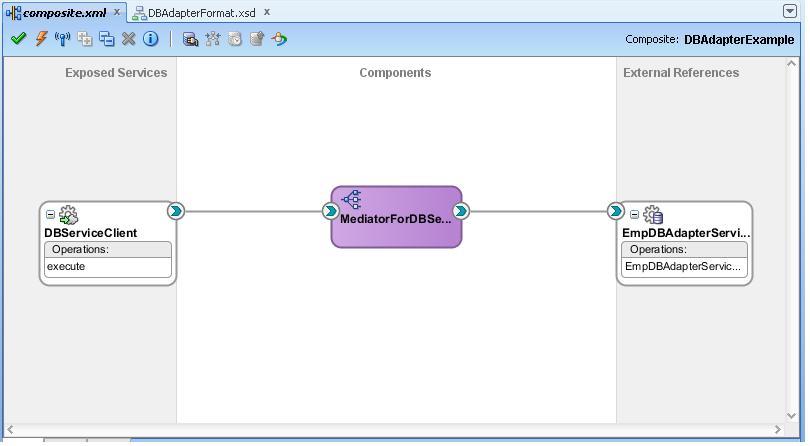
Now, wire DBServiceClient to Mediator and Mediator to EmpDBAdapterService

Double click on the Mediator to open its configuration file, a .mplan file.
In this file, we can configure various options for the mediator.
If you observe, the mplan file has 2 sections in the Static Routing Section, one for request and the other for the reply.

In our case, we will map the DBServiceClient’s input to the EmpDBAdapterService’s input and EmpDBAdapterService’s output to the DBServiceClient’s output
For this, click on the browse-like button(highlighted in the figure above) on the Transform Using option. It opens up a new window, where we select Create New Mapper File option.
This opens up the xsl transformation wizard where we map input from client to the service. It is straight forward, just drag a line b/w empId in the left to the right as shown in the figure below

Now, create a new mapper file for the response, in the Synchronous Reply section
The transformation that you do here is to concat the firstName and lastName from the Service to the fullName in the client.
From the component palette, In String Functions, drag concat function to the middle of the transform wizard
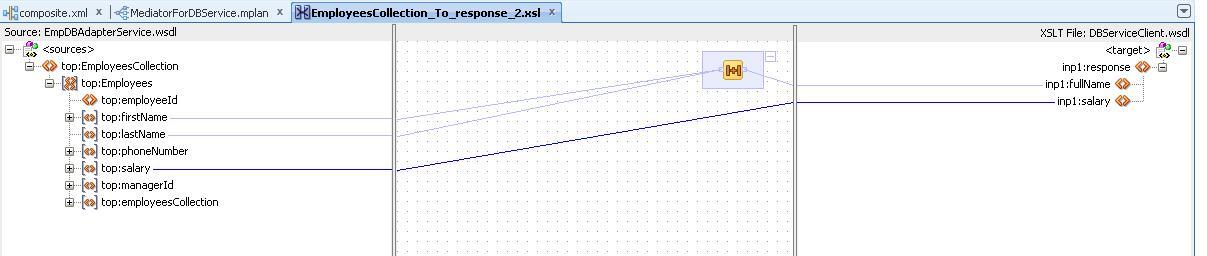
You can double click the concat function icon to do any additional modifications like adding spaces, extra characters, etc.
Similarly, link salary on both sides
This completes our example. Lets deploy and test it.
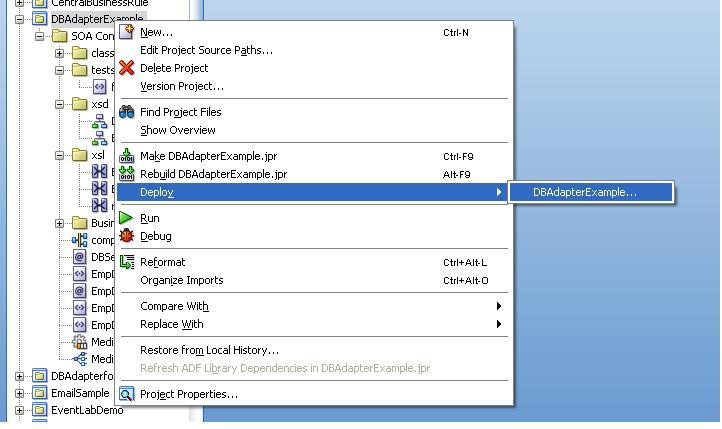
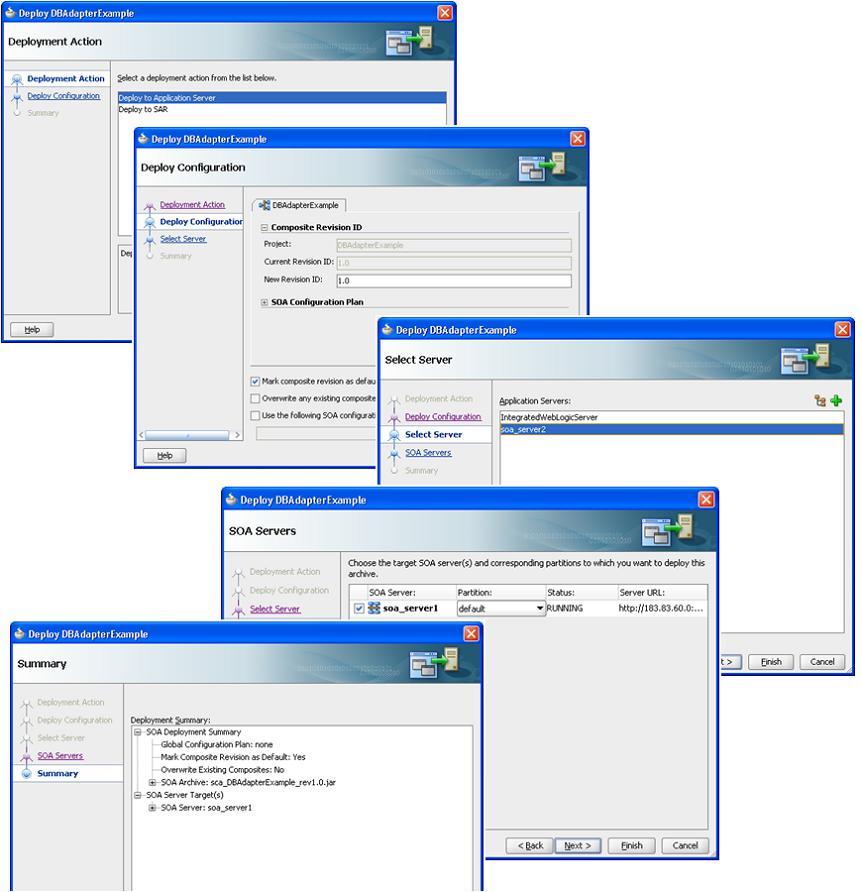
To deploy, right click on the prj –> Deploy –> select SOA Server
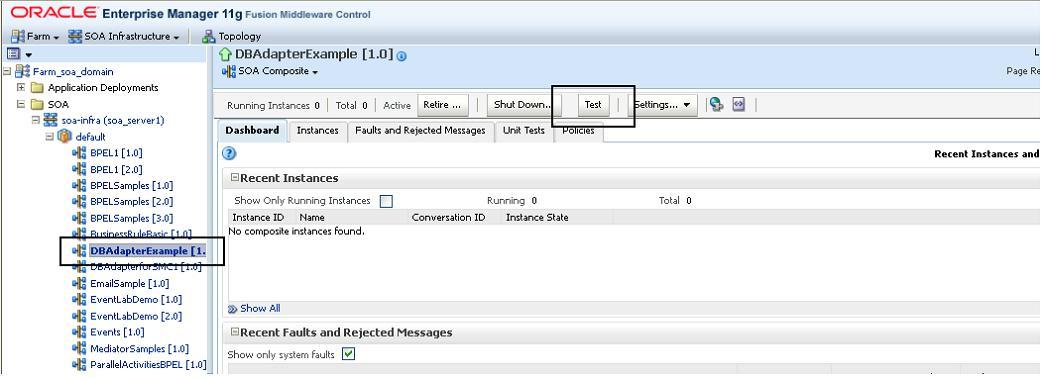
Oracle SOA Suite 11g provides a unified console to test and manage all the Fusion Middleware deployments by Fusion Enterprise Manager, also called EM.
Go to soa_domain –> SOA –> DBAdapterExample –> Test
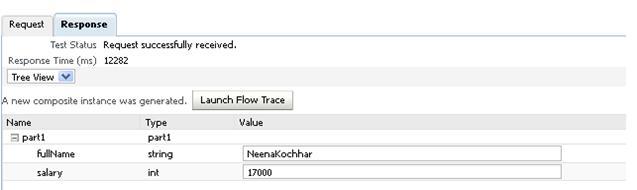
Give an input of 101 (employeeId), and check the result.
Input

Output
Hope this gives you a good understanding on what is a Database Adapter, and how to use it in SOA Applications.
In my next blog, I’ll take you through some of many nice to know features of the Database Adapter.
Featured Course : Oracle SOA
Improve your career by learning oracle soa and improving your skillset.