
Let us demonstrate the master-detail application in this blog. The application uses the HR schema and the Departments and Employees tables as master and detail entities respectively.
1) Create the EmployeeEO, DepartmentEO, and the associations between them and the EmployeeVO, DepartmentVO, and the view links between the VOs as described in the blog ( Follow the step-1 through step-10).
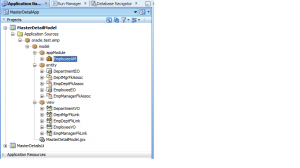
2) Once you create the business components, the components’ package structure should look like as there in the below screenshot.
3) Open EmployeeAM and goto DataModel tab. Remove the existing VOs if present from the data model and add the DepartmentVO that you created in the step-1. Also add the EmployeeVO through the viewlink that present inside the DepartmentVO.
4) Run the EmployeeAM and the AM wizard looks like the below screenshot.
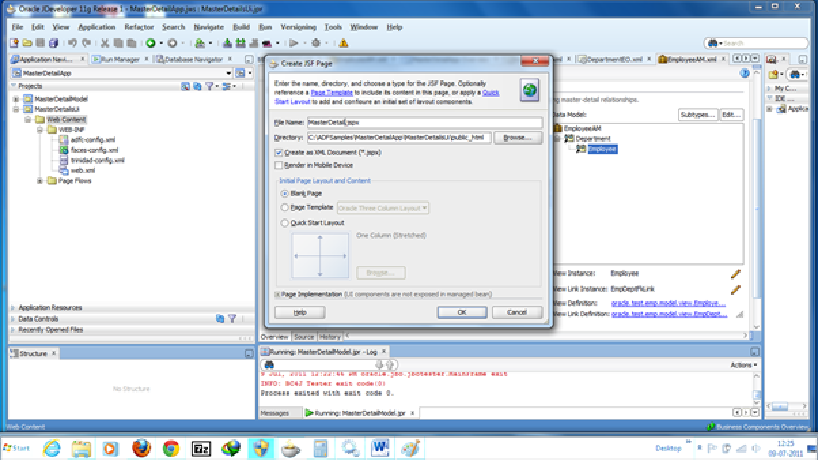
5) Now, we will show the master-detail layout in a simple jspx page. Goto the UI project, MasterDetailUi, and right-click on it and create a jspx page.
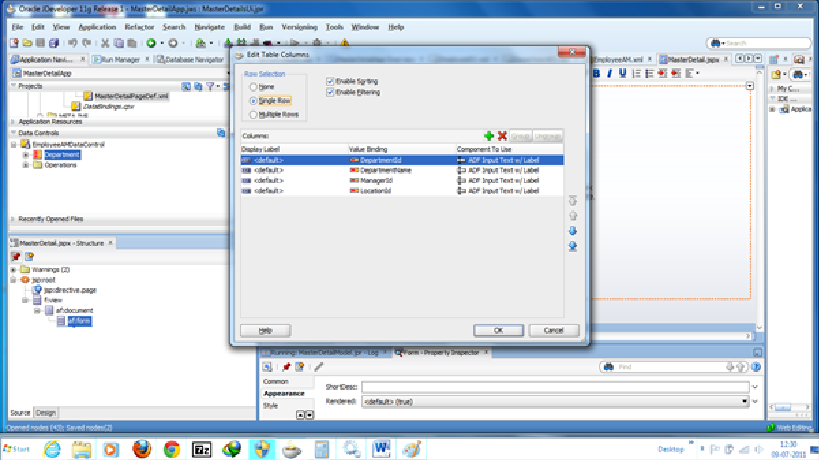
6) Now drop the DepartmentVO from the EmployeeAMDataControl that is available in the DataControl panel of the JDev. Drop the DepartmentVO as the ADF Table onto the af:Form section of the jspx page. Once you drop the VO, a window ‘Edit table columns’ comes where you can add or delete the columns to show for the Department in the Ui. You can also enable sorting, filtering, rowSelection options in this window.
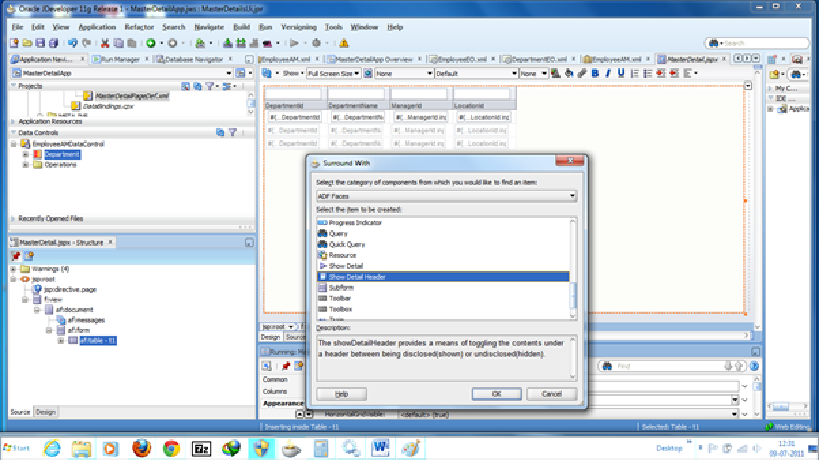
7) Surround the department table with showDetailHeader component that will be used to show the title for the table and to put the buttons used for creating and deleting the records for department table. To surround the showDetailHeader, right-click on af:table and select ‘Surround with …’ and select ‘ADF Faces’ from the dropdown and select showDetailHeader from the available list of components.
8) Change the TEXT property of the showDetailHeader to ‘Departments’. To change this property, select the showDetailHeader component in the structure pane and open the ‘Property inspector’ from the View menu of the JDev. In the property inspector, goto Common tab and change the TEXT property. And also the change the styleClass property to ‘AFStretchWidth’ that is available in the Style tab.
9) To stretch the table on the entire page, set the styleClass property to ‘AFStretchWidth’ that is available in the Style tab and also stretch one of the columns in the table. In Departments table, DepartmentName column is stretched in this application. To stretch any column, select the af:table and goto Appearance tab in the Property inspector and select the columnId for the ColumnStreching property.
10) Similarly, drag the EmployeeVO that is available inside the DepartmentVO of the EmployeeAMDataControl. Drag the EmployeeVO as ‘ADF Table’ and surround it with the showDetailHeader.
11) Set the styleClass property of the showDetailHeader and EmployeeTable to ‘AFStretchWidth’ and also set the columnStretch property for the EmployeeTable.
12) Add the action bindings of Create and Delete for the employee and department tables.
13) Open the jspx page and goto the Bindings tab. Click on the ‘+’ icon that presents in the Bindings section. Select ‘Generic Bindings’ from the dropdown and select ‘action’ from the available list and click on OK.
14) Click on the EmployeeAMDataControl and select DepartmentVO under it. Select the Operation as ‘CreateInsert’ from the dropdown list and click on Ok. Now ‘CreateInsert’ action binding got created for the Departments. Follow the same steps to create the ‘Delete’ action binding for the Departments entity.
15) Follow the same step as in step-14 to create the bindings ‘CreateInsert’ and ‘Delete’ action bindings for the Employee entity.
16) Now, we will create the action bindings for saving and canceling the changes for the page. Open the jspx page and goto the Bindings tab. Click on the ‘+’ icon that presents in the Bindings section. Select ‘Generic Bindings’ from the dropdown and select ‘action’ from the available list and click on OK. Click on the EmployeeAMDataControl and select the operation as ‘Commit’ from the dropdown. Similarly, create the ‘Rollback’ binding.
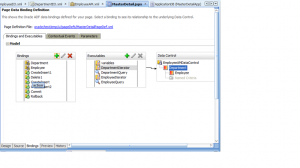
17) Now the Bindings tab of your jspx looks like as shown in the below screenshot.
18) Goto the jspx page in the structure pane and select the f:facet-toolbar of the Department’s showDetailHeader. Right-click on it and select Insert inside à ADF Faces.

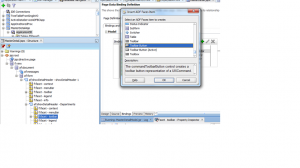
19) Now select the Toolbar button that is available in the component list of the Insert ADF Faces Item dialog.
20) Change the text property of the toolbar button to ‘Create’ and keep the EL expression #{bindings.CreateInsert.execute} for the actionListener property of the button.
21) Similarly, add one more button for the Cancel. Set the text property of the second button to ‘Cancel’ and set the actionListener property of the button to ‘#{bindings.Delete.execute}’.
22) Follow the steps in 20 and 21 to add the two toolbar buttons inside the f:facet-toolbar of the showDetailHeader of the employees table. Add the actionListener properties as #{bindings.CreateInsert1.execute} and ‘#{bindings.Delete1.execute}’ for the Create and Delete buttons of the employee.
23) Add another showDetailHeader inside the af:form section of your jspx and add two buttons inside the f:facet-toolbar. Set the text and actionListener properties of the first button to ‘Save’ and ‘#{bindings.Commit.execute} resp. Similarly set the text and actionListener properties of the first button to ‘Cancel’ and ‘#{bindings.Rollback.execute} resp. These two buttons are responsible for saving and cancel the changes that are made to any of the tables (Department or Employee) on this page.
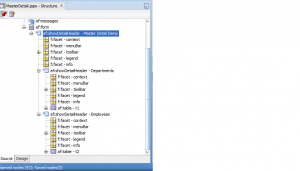
24) Now drag the showDetailHeaders of the Departments and Employees inside the showDetailHeader that we just created in the step-23.Now your page structure looks like
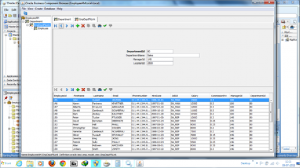
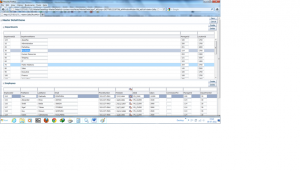
25) Now save your work and run the jspx page. You can create/update/delete the departmetns and employees and save or cancel your changes from the jspx page. The page looks like
Download sample application :MasterDetailApp
— Email us to get the Application Zip